Recent Posts
Protecting Your Pets from Home Fires: Expert Tips for Keeping Your Furry Friends Safe
12/16/2024 (Permalink)
 Explore expert insights on how to protect your pets from fire hazards.
For many of us, pets are beloved members of the family, and their safety is a top priority. However, when it comes to fire prevention and preparedness, many pet owners may not consider the unique risks their animals face. At SERVPRO®, we understand the importance of keeping your entire household—including pets—safe from home fires in Woburn, MA. In this blog, we’ll explore expert insights on how to protect your pets from fire hazards and what steps you can take to keep them safe in the event of a fire.
The Growing Risk of Home Fires
Home fires are more common than many people realize. According to the National Fire Protection Association (NFPA), U.S. fire departments responded to an average of 338,000 home structure fires in 2021, resulting in millions of dollars in damage. For pet owners, these statistics are a reminder of the importance of fire prevention and having a plan in place to protect pets in the event of an emergency.
Fire Safety Tips for Pet Owners
While preventing home fires is critical for everyone, pet owners should take additional steps to ensure their pets are safe from fire hazards. Here are some practical tips to help you protect your pets and prevent fire-related accidents:
1. Remove Potential Fire Hazards
Pets are curious by nature, and this curiosity can sometimes lead to accidental fires. Animals may knock over candles, chew on electrical cords, or nudge appliances, creating fire hazards. To reduce these risks:
- Avoid open flames: Never leave lit candles unattended, especially if you have pets. Consider switching to flameless candles for added safety.
- Secure electrical cords: Keep electrical cords and power strips out of reach of pets to prevent them from chewing or playing with them.
- Unplug appliances: Make it a habit to unplug small appliances like space heaters or hairdryers when not in use.
2. Use Pet-Safe Fire Detection and Prevention Devices
There are several devices available that can help you protect your pets in case of a fire:
- Smoke detectors: Make sure your home is equipped with working smoke detectors in all major areas. Some smart smoke detectors can send alerts to your phone, allowing you to take action if a fire starts when you're not home.
- Pet alert window stickers: Place pet alert stickers in windows to notify first responders that there are animals inside your home. This can be crucial in helping firefighters locate and rescue your pets during a fire.
3. Create a Pet Fire Emergency Plan
Having an emergency plan in place is key to ensuring the safety of your pets during a fire. Here are steps to take when creating a pet emergency plan:
- Assign a pet rescue task: Assign one family member to be responsible for grabbing the pets in the event of an emergency. Practice fire drills that include evacuating with pets to ensure everyone knows what to do.
- Designate a safe space: Identify a safe space in or near your home where pets can be quickly secured during a fire emergency. Ensure this space is easily accessible.
- Keep pet carriers and leashes handy: If you need to evacuate quickly, you won’t have time to search for pet carriers or leashes. Store these items in an easily accessible location near exits.
4. Prepare for Firefighter Assistance
Sometimes, it may not be possible to reach your pets during a fire. In these cases, preparing your home for firefighter assistance can make a difference in your pets’ safety:
- Keep pet identification updated: Make sure your pets are microchipped and that your contact information is up to date. This increases the chances of being reunited with your pets if they escape or are rescued.
- Close interior doors: If you must leave pets at home while you’re away, try to confine them to a single room near an entrance. Firefighters can more easily locate and rescue pets if they are confined to one area.
5. Use Pet Monitors for Peace of Mind
If you frequently leave your pets at home, consider using a pet monitor to keep an eye on them when you’re not there. Some monitors even come equipped with smoke and heat sensors, giving you real-time alerts if a fire is detected. This allows you to act quickly and notify authorities if necessary.
Conclusion
Protecting your pets from home fires requires a proactive approach to fire safety and planning. By removing fire hazards, installing pet-friendly fire detection devices, and creating a fire emergency plan, you can help ensure your pets’ safety in the event of a fire. At SERVPRO, we’re committed to helping families protect their homes and pets with expert fire damage restoration and prevention services.
By following these expert tips, you can reduce the risk of fire-related accidents and ensure that your furry friends are safe and prepared in the event of an emergency. For more information on fire prevention and how SERVPRO can help you restore your home after fire damage, contact us today!
Protecting Your Furry Friends: Pets and Mold Prevention Tips
11/13/2024 (Permalink)
 In this guide, we'll explore expert insights on protecting your pets from mold, while also offering practical tips to keep your home safe & mold-free.
When it comes to our pets, their well-being is always a top priority. But did you know that mold can pose a risk to your furry friends? Whether you have a dog, cat, or small critters, it's crucial to be aware of the dangers of mold in your home in Woburn, MA. Mold thrives in damp, humid environments, and can easily grow undetected in various areas of your house, such as basements, bathrooms, and crawl spaces. In this guide, we'll explore expert insights on protecting your pets from mold, while also offering practical tips to keep your home safe and mold-free.
What Is Mold and Where Does It Hide?
Mold is a type of fungus that grows in moist environments and can quickly spread if left unchecked. While mold is often associated with visible patches on walls, ceilings, and floors, it can also hide in areas you might not think to check, such as behind wallpaper, under sinks, and inside ventilation systems. It thrives in environments where there’s water damage or excessive humidity, making these areas prime spots for mold growth.
Pets, who spend a lot of time close to the ground and may even frequent basements or bathrooms, are often exposed to areas prone to mold growth.
According to the Environmental Protection Agency (EPA), mold can begin to grow on surfaces within 24-48 hours of water exposure in a humid environment. Proper home maintenance and mold prevention strategies can make a world of difference when it comes to protecting your pets and your home.
How to Protect Your Pets from Mold
Protecting your pets from mold starts with taking proactive steps to prevent mold from growing in the first place. Here are some practical tips for keeping your home mold-free and ensuring the safety of your furry friends:
1. Maintain Proper Ventilation
- Ensure that your home has proper airflow, particularly in areas prone to moisture, such as bathrooms and kitchens.
- Use exhaust fans or open windows to reduce humidity, especially after cooking, showering, or washing dishes.
2. Control Humidity Levels
- Aim to keep indoor humidity levels below 60%. You can use a hygrometer to monitor humidity in your home.
- Consider investing in a dehumidifier, particularly in high-humidity areas like basements and attics.
3. Regularly Clean Pet Areas
- Clean your pet’s bedding, toys, and living spaces frequently to avoid moisture build-up. Mold can easily grow in damp, unwashed pet items.
- Ensure that water dishes and feeding areas are cleaned daily and dried thoroughly to prevent mold growth.
4. Inspect Your Home for Water Damage
- Regularly check for leaks in your plumbing, roof, and windows. Mold can develop quickly in areas affected by water damage.
- If you notice any signs of water damage, address the issue immediately to prevent mold from growing.
5. Address Mold Issues Promptly
- If you discover mold in your home, it’s essential to take action right away. Mold spreads quickly, so contacting a professional remediation service, like SERVPRO®, can help mitigate the problem before it gets out of hand.
Why SERVPRO Is Your Trusted Mold Remediation Partner
When mold strikes, it’s essential to address the issue immediately to keep your pets and home safe. SERVPRO professionals are experts in mold remediation and can quickly assess, contain, and remove mold from your home. With advanced equipment and techniques, SERVPRO ensures that your home is thoroughly cleaned and free of mold, giving you peace of mind.
SERVPRO technicians follow industry standards to remove mold effectively, and their expertise guarantees that your home will be safe for you and your pets. By addressing the issue promptly, they help prevent further mold growth, protecting your furry companions from unnecessary exposure to potentially harmful environments.
Mold Prevention: A Worthwhile Investment
Taking steps to prevent mold in your home is essential for the well-being of your pets. Not only does it ensure a safe and comfortable living environment, but it also helps avoid costly mold remediation in the future. Simple measures like maintaining good ventilation, controlling humidity levels, and promptly addressing water damage can go a long way in keeping your home mold-free.
By partnering with a trusted service like SERVPRO, you can rest assured that any mold issue will be professionally handled, ensuring the health and happiness of both you and your pets.
By implementing these mold prevention tips and staying proactive, you can protect your furry friends and maintain a safe, comfortable home. Don't wait for mold to become a problem—take action today to safeguard your pets from its risks.
How to Protect Older Homes from Water Damage
10/16/2024 (Permalink)
 We’re here to help you clean up any water damage and restore your home back to normal!
Older homes have a charm and character that many newer houses lack. However, with that charm often comes a unique set of challenges, particularly when it comes to water damage. In Burlington, MA, homeowners of older properties need to be especially vigilant about potential water damage issues. This blog will explore the common causes of water damage in older homes, prevention tips, and steps to take if your home is affected.
Common Causes of Water Damage in Older Homes
Old Plumbing Systems
Older homes often have outdated plumbing systems made from materials like galvanized steel or cast iron, which can corrode and deteriorate over time. This corrosion can lead to leaks and bursts, causing significant water damage.
Roofing Issues
Roofs on older homes may have missing or damaged shingles, worn-out flashing, or other issues that allow water to seep in. This can result in water damage to the attic, ceilings, and walls.
Poor Drainage Systems
Many older homes were built without modern drainage systems, leading to water pooling around the foundation. This can cause basement flooding and structural damage over time.
Worn Waterproofing
Waterproofing materials and techniques used decades ago may no longer be effective. Basements and crawl spaces in older homes are particularly vulnerable to water intrusion if the waterproofing has failed.
Hidden Leaks
Hidden leaks behind walls or under floors can go unnoticed for long periods, causing extensive damage. These leaks often occur in places where pipes have aged and weakened.
Prevention Tips
Regular Inspections
Regular inspections of your home’s plumbing, roof, and foundation can help identify potential issues before they become major problems. Look for signs of wear and tear, such as rust on pipes, missing shingles, or cracks in the foundation.
Upgrade Plumbing and Roofing
Consider upgrading your home’s plumbing and roofing systems if they are old or showing signs of damage. Modern materials are more durable and can prevent future water damage.
Improve Drainage
Ensure that your home has a proper drainage system to direct water away from the foundation. This might involve installing gutters, downspouts, and French drains.
Use Dehumidifiers
Basements and crawl spaces in older homes can benefit from the use of dehumidifiers to reduce moisture levels and prevent mold growth. Keeping humidity levels below 60% can significantly reduce the risk of water damage.
Steps to Take If Your Home Is Affected
Act Quickly
If you discover water damage in your home, it’s crucial to act quickly to prevent further damage. The longer water sits, the more extensive the damage can become.
Remove Standing Water
Use pumps, wet/dry vacuums, and towels to remove any standing water as soon as possible. This will help prevent water from seeping into walls and floors.
Dry and Dehumidify
Thoroughly dry the affected areas using fans and dehumidifiers. Ensure that all moisture is removed to prevent mold growth.
Clean and Disinfect
Clean and disinfect all surfaces that come into contact with water. Use mold-killing products to ensure that any mold spores are eliminated.
Seek Professional Help
For significant water damage, it’s best to seek professional help. Water damage restoration specialists have the tools and expertise to handle the situation effectively.
Protect Your Burlington Home
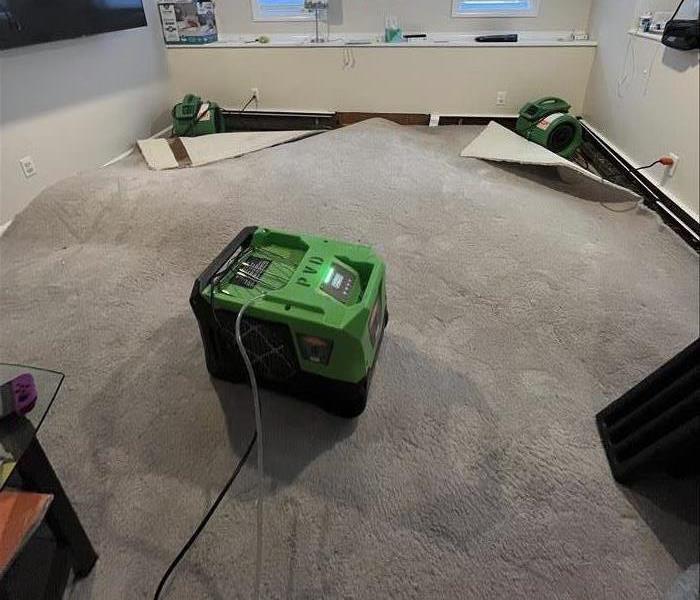
Water damage in older homes can be a serious issue, but with regular maintenance and immediate action, it can be managed effectively. If you encounter water damage in your Burlington, MA home, don’t hesitate to contact SERVPRO of Burlington/Woburn. We’re here to help you clean up any water damage and restore your home back to normal!
Safeguard Your Windows: Essential Tips to Protect Against Wind and Debris During Northeast Storms
9/11/2024 (Permalink)
 This blog provides essential tips to protect your windows from wind and debris during Northeast storms.
Northeast storms can be fierce, especially in Woburn, MA, bringing strong winds and flying debris that pose significant risks to your property. Windows are particularly vulnerable, and taking the right precautions can save you from costly repairs and ensure your safety. This blog provides essential tips to protect your windows from wind and debris during Northeast storms.
Understanding the Risk: Wind and Debris Damage in Massachusetts
Massachusetts experiences frequent storms, with wind and debris damage being a common concern. In 2022, the state reported over $20 million in damages from severe wind events, underscoring the importance of proactive measures.
Install Storm Shutters
Storm shutters are a highly effective way to protect your windows from high winds and flying debris. Available in various materials such as aluminum, steel, and polycarbonate, storm shutters are designed to withstand extreme weather conditions. They are easy to deploy before a storm and provide robust protection, significantly reducing the risk of window breakage.
Use Impact-Resistant Glass
Investing in impact-resistant glass for your windows is another excellent strategy. This type of glass is specially engineered to resist shattering when struck by debris. It consists of multiple layers, typically a combination of glass and a durable plastic interlayer, making it much stronger than regular glass. Impact-resistant windows not only protect against storm damage but also enhance your home's security and energy efficiency.
Secure Window Frames
A window is only as strong as its frame. Ensuring that your window frames are securely fastened to the house structure is crucial. Reinforce the frames with weather-resistant sealants and consider additional hardware, such as brackets or clips, to keep them firmly in place during high winds.
Clear Surrounding Debris
One of the simplest yet most effective ways to protect your windows is to maintain a debris-free yard. Regularly trim trees and remove loose branches, which can become dangerous projectiles during a storm. Secure outdoor furniture, tools, and other items that could be picked up by strong winds and hurled toward your windows.
Install Window Film
Applying a protective film to your windows can add an extra layer of defense against shattering. These films are designed to hold broken glass in place, reducing the likelihood of injury from flying shards and maintaining the integrity of the window structure. Window films are a cost-effective solution that can be easily applied and replaced as needed.
Stay Informed and Prepared
Staying updated with weather forecasts and having an emergency plan in place can significantly enhance your storm preparedness. Ensure that all household members know the plan and have access to necessary supplies, such as plywood or other materials to board up windows if needed.
Protecting your windows from the ravages of Northeast storms requires a combination of proactive measures and smart investments. By following these tips, you can significantly reduce the risk of damage and keep your home safe. Stay vigilant, stay prepared, and safeguard your property against the unpredictable forces of nature.
For more information and professional assistance in storm damage restoration, contact SERVPRO® today.
The Impact of Wildfires on Air Quality: What You Need to Know
8/14/2024 (Permalink)
 We delve into how wildfires deteriorate air quality, the health risks involved, and the steps you can take to protect yourself.
Wildfires have become increasingly frequent and severe, significantly affecting air quality and public health. As these natural disasters rage through forests and communities, understanding their impact on the air we breathe is crucial. In this blog, we delve into how wildfires deteriorate air quality, the health risks involved, and the steps you can take to protect yourself.
How Wildfires Affect Air Quality
Release of Harmful Pollutants
When wildfires burn, they release a variety of harmful pollutants into the atmosphere. These include particulate matter (PM2.5), carbon monoxide, nitrogen oxides, and volatile organic compounds (VOCs). PM2.5, tiny particles that can penetrate deep into the lungs, is particularly concerning due to its ability to cause respiratory and cardiovascular issues.
Smoke Dispersion
Wildfire smoke can travel hundreds of miles, affecting air quality far from the fire’s origin. The smoke's dispersion depends on wind patterns, topography, and weather conditions. This widespread distribution means that even if you are not near a wildfire, you can still experience poor air quality due to drifting smoke.
Health Risks Associated with Wildfire Smoke
Respiratory Issues
Exposure to wildfire smoke can exacerbate existing respiratory conditions such as asthma, bronchitis, and COPD (Chronic Obstructive Pulmonary Disease). The fine particles in the smoke can cause inflammation and reduce lung function, leading to difficulty breathing, coughing, and wheezing.
Cardiovascular Problems
Wildfire smoke is not only harmful to the respiratory system but also poses significant risks to cardiovascular health. Studies have shown a correlation between smoke exposure and increased incidents of heart attacks, strokes, and other cardiovascular events. The pollutants in the smoke can trigger inflammation and oxidative stress, adversely affecting heart health.
Vulnerable Populations
Certain groups are more susceptible to the adverse effects of wildfire smoke, including children, the elderly, pregnant women, and individuals with pre-existing health conditions. It is essential for these vulnerable populations to take extra precautions during wildfire season.
How to Protect Yourself from Wildfire Smoke
Stay Informed
Monitor local air quality reports and stay updated on wildfire news. Websites like AirNow provide real-time air quality information, helping you make informed decisions about outdoor activities.
Limit Outdoor Activities
When air quality is poor, reduce or avoid outdoor activities, especially strenuous ones. Staying indoors with windows and doors closed can help minimize exposure to harmful pollutants.
Use Air Purifiers
Using air purifiers with HEPA filters can significantly improve indoor air quality. These devices are effective in removing fine particulate matter from the air, making your indoor environment safer.
Wear Masks
If you must go outside, wearing N95 masks can provide some protection against inhaling fine particles. These masks are designed to filter out at least 95% of airborne particles, offering better protection than regular cloth masks.
The impact of wildfires on air quality is a growing concern as these events become more frequent and intense. Understanding the pollutants released by wildfires, the associated health risks, and how to protect yourself can help mitigate their adverse effects. Stay informed, take precautionary measures, and prioritize your health during wildfire season to ensure you and your loved ones remain safe.
By following these guidelines, you can better navigate the challenges posed by wildfire smoke and maintain better air quality in your surroundings.
Understanding the Relationship Between Mold and Water Damage
7/10/2024 (Permalink)
 We explore the connection between mold and water damage and provide insights into how to address both issues effectively.
Mold and water damage often go hand in hand, creating a symbiotic relationship that can wreak havoc on homes and businesses. Understanding how mold thrives in damp environments and how water damage contributes to its growth is essential for effective prevention and remediation. In this blog post, we'll explore the connection between mold and water damage and provide insights into how to address both issues effectively.
The Role of Water Damage in Mold Growth
Water damage provides the ideal conditions for mold to flourish. Whether it's from a burst pipe, roof leak, or flooding, excess moisture can seep into building materials and create a breeding ground for mold spores. Here's how water damage contributes to mold growth:
Moisture Accumulation
Water damage leads to the accumulation of moisture in building materials such as drywall, wood, and insulation. This moisture creates the perfect environment for mold spores to germinate and multiply.
Poor Ventilation
Areas affected by water damage often have poor ventilation, further exacerbating the problem. Without adequate airflow, moisture becomes trapped indoors, increasing the likelihood of mold growth.
Organic Substrates
Water-damaged materials provide organic substrates for mold to feed on. As mold spores settle on damp surfaces, they begin to digest organic matter, breaking it down and spreading throughout the affected area.
Preventing Mold Growth in Water-Damaged Areas
Prompt Water Removal
The key to preventing mold growth after water damage is to remove excess moisture promptly. This may involve extracting standing water, drying out affected materials, and utilizing dehumidifiers to reduce indoor humidity levels.
Thorough Drying
Ensure thorough drying of water-damaged areas to prevent lingering moisture that could fuel mold growth. Use fans, heaters, and specialized drying equipment to expedite the drying process and mitigate the risk of mold contamination.
Mold Inhibitors
Consider applying mold inhibitors or antimicrobial treatments to water-damaged surfaces to prevent mold growth. These products can help inhibit the growth of mold spores and protect against future infestations.
Addressing Mold Growth in Water-Damaged Areas
Professional Inspection
If mold growth is suspected in water-damaged areas, it's essential to seek professional inspection and remediation services. Trained technicians can assess the extent of the mold problem, identify underlying moisture issues, and recommend appropriate remediation measures.
Mold Remediation
Professional mold remediation involves the safe and thorough removal of mold-contaminated materials. Specialized equipment and techniques are used to contain mold spores, remove affected materials, and restore the indoor environment to a clean and mold-free state.
Preventative Measures
Once mold remediation is complete, it's crucial to implement preventative measures to prevent future mold growth. This may include repairing leaks, improving ventilation, and maintaining indoor humidity levels within recommended ranges.
Mold and water damage share a symbiotic relationship, with excess moisture providing the perfect breeding ground for mold growth. By understanding the connection between mold and water damage and taking proactive measures to address both issues, homeowners and business owners can safeguard their properties against mold contamination and maintain a healthy indoor environment. If you're dealing with mold or water damage, don't hesitate to contact a professional restoration company like SERVPRO® for expert assistance.
Shielding Your Home: The Crucial Role of Proper Insulation in Preventing Water Damage
6/20/2024 (Permalink)
Water damage can wreak havoc on homes, causing structural deterioration, mold growth, and costly repairs. While external factors such as heavy rainfall and flooding contribute to water intrusion, the role of proper insulation in preventing water damage is often overlooked. In this blog, we'll delve into the critical role of insulation in safeguarding homes against water damage and explore how homeowners can ensure their insulation is up to the task of protecting their property.
Barrier Against Moisture
Proper insulation acts as a barrier against moisture infiltration, helping to prevent water from seeping into the home's interior. Insulation materials such as foam boards, spray foam, and fiberglass create a protective barrier that resists water penetration, keeping the interior of the home dry and free from water damage.
Reducing Condensation
In addition to preventing external moisture intrusion, insulation helps regulate indoor humidity levels and reduces condensation buildup. Condensation occurs when warm, moist air comes into contact with cold surfaces, leading to water droplets forming on walls, ceilings, and windowsills. Proper insulation helps maintain consistent indoor temperatures, minimizing condensation and the risk of water damage caused by excess moisture buildup.
Protecting Pipes and Plumbing
Insulation plays a crucial role in protecting pipes and plumbing fixtures from freezing temperatures and subsequent bursts. Properly insulated pipes are less susceptible to freezing, reducing the risk of pipe bursts and water damage. Insulating exposed pipes in attics, crawl spaces, and exterior walls helps maintain consistent temperatures and prevents water damage caused by frozen or burst pipes.
Preventing Roof Leaks
Roof insulation is essential for preventing roof leaks and water damage. Proper insulation in the attic helps regulate attic temperatures, reducing the risk of ice dams and snowmelt infiltration that can lead to roof leaks. Additionally, insulation helps prevent heat loss through the roof, minimizing the formation of ice dams and reducing the likelihood of water infiltration during winter months.
Enhancing Energy Efficiency
Beyond its role in preventing water damage, insulation contributes to overall energy efficiency and comfort in the home. Properly insulated homes require less energy for heating and cooling, reducing utility bills and environmental impact. By sealing gaps and reducing air leakage, insulation helps maintain consistent indoor temperatures, ensuring a comfortable living environment year-round.
Choosing the Right Insulation
Selecting the right insulation materials and installation methods is crucial for maximizing the effectiveness of your home's insulation. Consider factors such as R-value, moisture resistance, and compatibility with existing building materials when choosing insulation for your home. Consult with insulation professionals to determine the most suitable insulation options for your climate, budget, and specific needs.
Proper insulation plays a vital role in protecting homes against water damage, reducing energy consumption, and enhancing overall comfort and durability. By serving as a barrier against moisture infiltration, reducing condensation, protecting pipes and plumbing, preventing roof leaks, and enhancing energy efficiency, insulation helps safeguard homes from the devastating effects of water damage. Homeowners should prioritize proper insulation installation and maintenance to ensure their homes remain dry, comfortable, and resilient for years to come.
Spring Storm Survival Guide: Preparing Your Home for Nature’s Unpredictability
5/13/2024 (Permalink)
Spring, with its blossoming flowers and warmer temperatures, also brings the potential for unpredictable and sometimes severe weather. From thunderstorms to heavy rainfall, it's crucial to prepare your home for the challenges that spring storms can bring. Here's a comprehensive guide to help you fortify your home and weather the spring storms with confidence.
Create an Emergency Kit
Assemble an emergency kit that includes essential items such as non-perishable food, water, flashlights, batteries, a first aid kit, important documents, and any necessary medications. Keep this kit in a readily accessible and known location.
Establish a family emergency plan that outlines evacuation routes, designated safe areas within your home, and communication protocols. Ensure all family members are familiar with the plan and practice emergency drills.
Secure Outdoor Items
High winds are common during spring storms, so secure or bring indoors any outdoor items that could become projectiles. Patio furniture, grills, and other loose objects should be safely stored to prevent damage.
Ensure your gutters are free of debris to allow for proper drainage during heavy rainfall. Clogged gutters can lead to water damage and contribute to flooding, so clean them regularly, especially before the stormy season.
Trim Trees and Branches
Prune overhanging branches and trim trees to reduce the risk of falling limbs during strong winds. Clear dead or weak branches that may pose a threat to your home or power lines.
Inspect your roof for loose or damaged shingles. A well-maintained roof is crucial for preventing leaks during heavy rain. Address any issues promptly to avoid water damage.
Seal Windows and Doors
Ensure windows and doors are properly sealed to prevent water infiltration. Weatherstripping and caulking can help create a watertight seal and enhance energy efficiency.
If you live in an area prone to severe storms, consider installing storm shutters to protect windows from high winds and flying debris. Alternatively, pre-cut plywood panels can be used to board up windows.
Check Sump Pump Functionality
If you have a basement, ensure your sump pump is in good working condition. Test it regularly to ensure it can efficiently handle excess water and prevent basement flooding.
Ensure your heating, ventilation, and air conditioning (HVAC) system is functioning correctly. Clean or replace air filters, and consider investing in a surge protector to safeguard the system against power surges.
Keep important documents, such as insurance policies, identification, and medical records, in a waterproof container. Store this container in a secure yet easily accessible location.
Install Surge Protectors
Power surges are common during storms and can damage electronic devices. Install surge protectors to safeguard sensitive equipment like computers, televisions, and appliances. Keep a weather radio or a reliable weather app handy to stay informed about storm developments. Pay attention to weather alerts and heed evacuation warnings if necessary.
Have a backup power source, such as a generator, to keep essential appliances running during power outages. Stock up on batteries for flashlights and consider investing in a portable phone charger. Familiarize yourself with local evacuation routes and shelters. In case of severe storms or flooding, knowing where to go and how to get there can be crucial for your safety.
By implementing these measures, you can fortify your home against the challenges posed by spring storms. Preparation is key to minimizing potential damage and ensuring the safety and well-being of your family. Stay vigilant, stay informed, and be ready to weather the storm with confidence.
Harnessing the Power: A Guide to Safely Using and Storing Propane Tanks
4/15/2024 (Permalink)
Propane, a versatile fuel commonly used for heating, cooking, and powering various appliances, has become a staple in many households. While its benefits are undeniable, ensuring the safe use and storage of propane tanks is paramount. In this blog, we'll explore essential guidelines to help you harness the power of propane while prioritizing safety.
Choosing the Right Tank
Certification Matter
When purchasing a propane tank, ensure it is certified by a reputable regulatory body. Certification guarantees that the tank meets strict safety standards.
- Size Considerations
- Choose a propane tank size that suits your usage needs. Larger tanks are suitable for high-demand applications, while smaller ones are ideal for occasional use.
- Inspect for Damage
- Before use, inspect the propane tank for any signs of damage, such as dents, rust, or visible wear. Damaged tanks should not be used and must be replaced.
Safe Handling Practices
- Transportation Precautions
- When transporting propane tanks, ensure they are secured in an upright position. Use a well-ventilated vehicle and avoid leaving tanks in a closed car.
- No Smoking Zone
- Smoking near propane tanks is a strict no-no. Always maintain a safe distance and prohibit smoking in areas where propane is being used or stored.
- Proper Connection
- When connecting a propane tank to an appliance, follow the manufacturer's instructions carefully. Use appropriate tools and ensure the connections are tight and leak-free.
Storage Guidelines
Outdoor Storage
- Propane tanks should be stored outdoors in well-ventilated areas. Never store them in enclosed spaces like basements or sheds.
- Secure Placement
- Store propane tanks in an upright position on a flat, stable surface. Avoid placing them near flammable materials or ignition sources.
- No Hot Zones
- Keep propane tanks away from direct sunlight and heat sources. Exposure to high temperatures can increase internal pressure and pose a safety risk.
Emergency Preparedness
- Emergency Shut-Off
- Familiarize yourself with the emergency shut-off valve on your propane tank. In case of an emergency, knowing how to quickly shut off the supply is crucial.
- Regular Checks
- Conduct regular checks for leaks using a propane leak detector solution or soapy water. If bubbles appear, it indicates a leak, and the tank should be addressed immediately.
Disposal and Maintenance
- Professional Inspections
- Schedule professional inspections for your propane system regularly. Certified technicians can identify potential issues and ensure the system's safety.
- Proper Disposal
- When a propane tank reaches the end of its life cycle, consult local guidelines for proper disposal procedures. Avoid disposing of tanks in standard waste streams.
Safely using and storing propane tanks is a responsibility that comes with the benefits of this versatile fuel. By adhering to these guidelines, you can enjoy the convenience of propane while minimizing potential safety risks. Whether you're cooking up a storm on the grill or keeping warm by a propane-fueled heater, following these practices ensures a safer and more enjoyable experience with this valuable energy source.
Unraveling the Mystery of Mold in Insulation: Strategies for Detection and Remediation
3/6/2024 (Permalink)
Insulation plays a crucial role in maintaining a comfortable and energy-efficient home. However, when mold infiltrates this hidden layer, it can pose challenges to both the insulation itself and the overall well-being of your living space. In this blog, we'll explore effective strategies for detecting and remediating mold in insulation without discussing health concerns.
Detecting Mold in Insulation
Mold often emits a distinct musty odor. If you notice unpleasant smells in your home, especially in areas with insulation, it could be a sign of mold presence.
Inspect visible portions of insulation for any discoloration. Mold may appear as dark spots, irregular patterns, or fuzzy growth on the surface.
Water stains, leaks, or signs of water damage near insulation are red flags. Moisture provides an ideal environment for mold growth within insulation layers.
Consider external factors such as roof leaks, plumbing issues, or faulty gutters. These problems can contribute to water intrusion and mold growth within insulation.
Remediation Strategies
Begin by isolating the areas with mold-infested insulation. This prevents the spread of mold spores to unaffected parts of the home.
- Remove and Discard Contaminated Insulation:
In cases of extensive mold growth, it may be necessary to remove and discard the contaminated insulation. This prevents further mold development and ensures a fresh start.
Clean the surrounding areas, including the framework and adjacent surfaces, to eliminate any remaining mold spores. Use mold-killing solutions to disinfect the affected space.
- Address Underlying Causes
Identify and address the root causes of mold growth, such as leaks or water intrusion. Fixing these issues is crucial to preventing future mold infestations in insulation.
Enhance ventilation in the affected areas. Good airflow helps to keep the environment dry and reduces the likelihood of mold recurrence.
- Apply Mold-Resistant Coatings
Consider applying mold-resistant coatings on the surfaces surrounding insulation. These coatings act as a protective barrier, discouraging mold growth.
Install Vapor Barriers
Install vapor barriers in areas prone to moisture. Vapor barriers help control humidity levels and prevent moisture from reaching the insulation.
Regularly monitor humidity levels within your home. Maintaining optimal humidity prevents the conditions that favor mold growth in insulation. For extensive mold infestations or cases where insulation replacement is necessary, consider hiring professionals with expertise in mold remediation. Implement preventative measures, such as regular home inspections, prompt repairs of leaks, and ongoing maintenance, to minimize the risk of mold returning to insulation.
Detecting and remediating mold in insulation requires a proactive approach. By identifying signs of mold early on and taking swift remedial actions, you safeguard the integrity of your insulation and contribute to a healthier home environment. Regular maintenance, addressing underlying causes, and promoting proper ventilation are key components in ensuring your insulation remains mold-resistant. Through these measures, you can enjoy the benefits of efficient and uncontaminated insulation in your home.


 24/7 Emergency Service